As I mentioned in one of the previous posts, I had a failed attempt at making a kimono. Thanks to that experience, I was able to learn from my mistakes and make a better version of the clothing. As in the last one I used my sewing machine, its details are in one of the last posts. I also reused some of the fabric from the previous one to add more shades of green as I thought it would look more interesting without the added effects. I, for now, still do not know how it will look like with the pattern, but I hope it will not be too bad. Here is the process of making the clothing, however, I would like to say that the fabric was getting wrinkly as I was cutting and sewing and moving it around, but in the final photos the kimono will be ironed.
1. I started by cutting out bigger pieces of fabric, I now realised I never had a photo of the pieces not sewn together, but I used this pattern:
I was cutting more to make it easier for me to sew but in general, I started with these shapes. As You can see, this time I did one back piece, rather than two as I thought it was unnecessary as it did not change anything.
2. Then I have sewn together the top parts of the front pieces and back pieces and then I attached the sides as well.
3. I have sewn together the longer sides of sleeve pieces to make one sleeve and repeated it for the other one as well
3. Next I added a little cutout on the side of the sleeve that would be attached to the body of the kimono, to make it easier to sew.
4. And after some struggles with keeping the sleeve in place, I have attached it to the body of the kimono
5. Here is a photo of the kimono on the right side. As You can see I have sewn the lower part of the sleeve on its own, without attaching it to the body. That is what I thought was the right thing to do

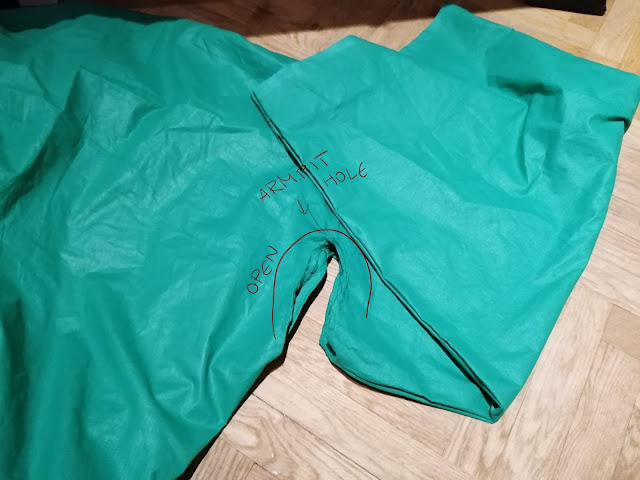
6. However, then I realised that in real kimonos there is in fact a vent in the place that I closed. It was on the sleeve but was going even further, on the body, making it possible for the people wearing the clothing to let air inside. So I opened the seams I made and hemmed them to make them more polished.
7. I then measured the sleeve again and came to the conclusion that it was a little bit too long, so I cut 20 cm off.
8. Next I added a hood, but sewing together a part of the back of the element making kind of a butterfly shape. Then I aligned the seam on the hood with the middle of the back piece and I have sewn it around, going a little on the collar of the front pieces. When I was done I connected the top of the hood.
9. After this step I hemmed all of the edges on the kimono. I also closed a 10 cm part on the lower part of the opening of the sleeve (where the hand is sticking out), as it is also how the kimono looks.
10. the last step was to add a ribbon at the edges of the front pieces (where they are closing onto each other). I did this as an artistic choice but also used it to hide a part where the hood is connected to the front.

I also made 'obi', the belt for the kimono, however, It is just a long piece of fabric that will be used to wrap my model. I do not have any photos of it as it is as mentioned, long and there was no way for me to photograph it, but it will be shown in the final photos.


Comments
Post a Comment